
How to Use Pain Mapping: Complete Beginner’s Guide
Are you struggling with unexplained aches that seem impossible to describe accurately to your doctor? The inability to accurately quantify pain often leads to misdiagnosis, ineffective generic treatments, and immense frustration during specialist consultations. By the end of this guide, you will understand how to use clinical pain mapping to document the exact location, timing, and triggers of your discomfort so you can secure a highly targeted treatment plan.
We will explore standardized clinical frameworks, physical mapping techniques, non-verbal psychological assessments, and evidence-informed interventions. This process utilizes The Dual-Axis Pain Evaluation — combining physical anatomical tracking with psychological assessment to uncover root causes. This article is for educational purposes only and does not replace consultation with a qualified medical professional.
Key Takeaways
How to Use Pain Mapping: Complete Beginner’s Guide principles involve combining physical anatomical tracking with standardized clinical reporting to uncover root causes.
- The Dual-Axis Pain Evaluation merges physical mapping with psychological assessments to provide a complete clinical picture.
- Clinical frameworks like PQRST and COLDSPA standardize symptom documentation for medical specialists.
- Trigger point tracking differentiates between localized injury and complex referred pain pathways.
- Non-verbal assessments utilizing art therapy tools assist in evaluating the psychological impact of chronic conditions.
Prerequisites for Pain Assessment
Before attempting to locate and track physical symptoms, patients must gather specific tools to ensure accurate documentation. Properly recording your symptom history prevents critical details from being overlooked during brief clinical appointments.
Estimated Completion Time: 14 Days (Includes initial 30-minute setup and consecutive two-week tracking period)
You will need the following items to execute a comprehensive assessment:
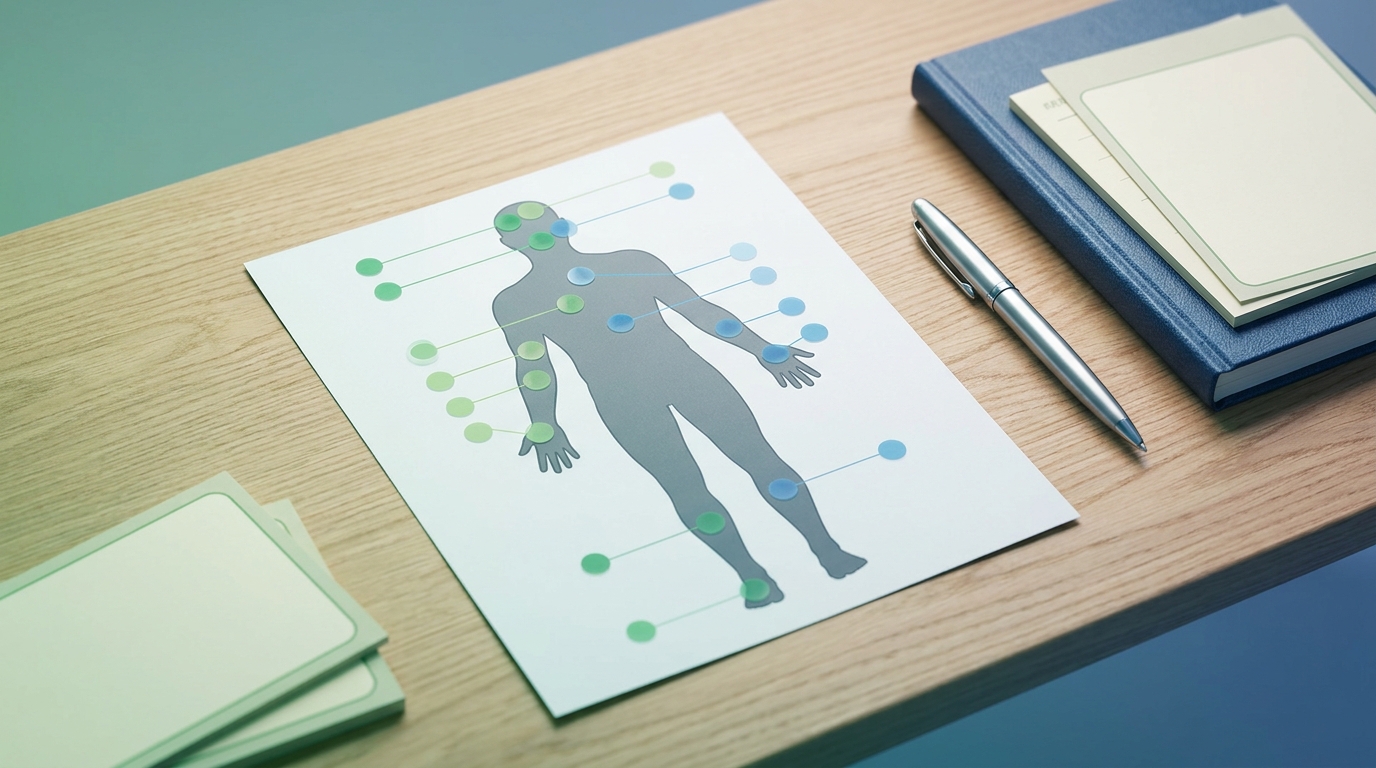
- An Anatomical Pain Map Template: A printed body outline (front and back) to visually mark exact locations of discomfort.
- Past Medical Records: Existing test results, imaging reports (MRIs, X-Rays), and a complete, current medication list to provide context.
- A Structured Pain Journal: A dedicated notebook or application to track the timing, severity, and triggers of symptom flare-ups over a consecutive 14-day period.
Step 1: Apply Clinical Pain Assessment Frameworks
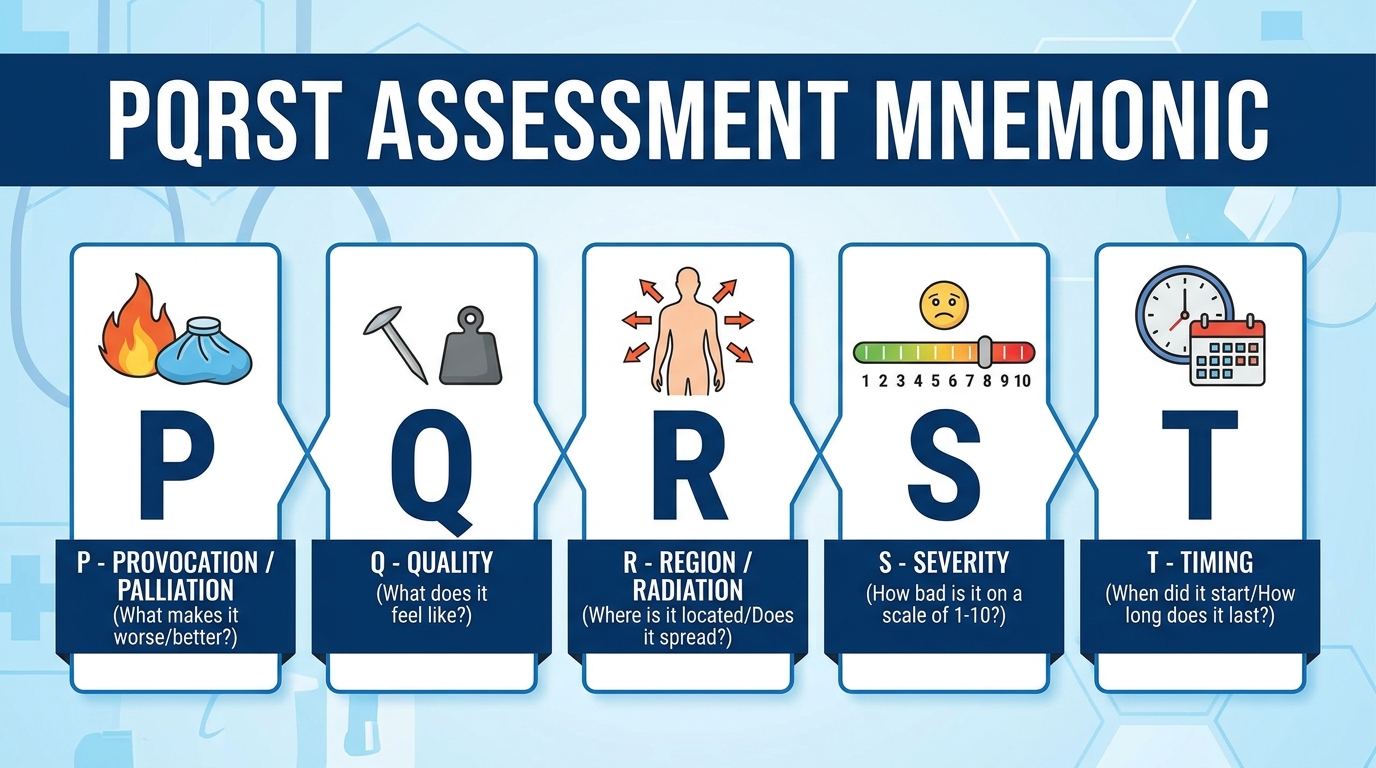
Clinical pain assessment frameworks are standardized mnemonic tools used to gather comprehensive symptom data during medical evaluations. Standardized pain assessments utilizing frameworks like PQRST can significantly reduce clinical error margins when tracking chronic conditions (U.S. Department of Veterans Affairs). This standardization allows clinicians to correctly categorize symptoms for rheumatology or neurology review, forming the foundation of The Dual-Axis Pain Evaluation.
Master the PQRST and COLDSPA Acronyms
- Learn the PQRST framework: The PQRST pain assessment tool, a clinical mnemonic for assessing pain characteristics, transitions vague complaints into actionable medical data. It stands for Provocation, Quality, Region/Radiation, Severity, and Timing. Utilizing this structured method allows patients to clearly articulate whether their pain is a sharp, stabbing sensation or a dull ache.
- Apply COLDSPA as an alternative: Similarly, the COLDSPA pain assessment is an alternative tool focusing on specific symptom dimensions: Character, Onset, Location, Duration, Severity, Pattern, and Associated factors. VHA clinical pain assessment guidelines indicate these frameworks drastically improve data gathering during brief specialist visits.
- Capture critical timeline metrics: Research confirming the clinical validity of the COLDSPA tool shows it captures critical timeline metrics during initial triage, ensuring that doctors can correctly identify neurological versus musculoskeletal issues. While verbal acronyms structure the dialogue, physical tracking maps the exact origins of the discomfort.
Acute vs. Chronic Assessments
- Determine the onset timeline: A focused pain assessment changes depending on the timeline of the patient’s discomfort. Acute pain presents suddenly, typically following a specific post-injury trauma, requiring immediate diagnostic evaluation such as emergency X-rays or MRIs.
- Evaluate chronic progression: Conversely, chronic pain persists beyond normal tissue healing timeframes, often lasting longer than three months. For chronic ongoing illness, the assessment targets progressive symptom patterns, joint stiffness timelines, and functional limitations over weeks, often fluctuating in intensity depending on daily activities.
- Capture chronic patterns effectively: To accurately communicate these ongoing issues, patients must physically map their trigger points and radiation pathways.
Step 2: Execute Pain Mapping
The pain mapping procedure is a systematic method for visually recording the precise location, severity, and movement of discomfort across the body. Referred pain patterns mapped during clinical palpation can indicate underlying fascial restrictions and trigger points located several centimeters away from the site of perceived pain (Stanford University). Proper mapping prevents ineffective local treatments by highlighting the true origin.
Locate Myofascial Trigger Points
- Understand myofascial tissue: Myofascial trigger points are hyperirritable spots located in the skeletal muscle fascia that often feel like dense, localized knots beneath the skin. These knots restrict blood flow and create palpable, painful tension.
- Execute the palpation technique: Identifying pain points safely involves a specific pain procedure guide: gently palpate (press) the muscle belly using the pads of your fingers, searching for tight bands of tissue that elicit a tender response. Move your fingers in a slow, circular motion to identify the exact center of the restriction.
- Document localized intensity: When you discover a knot, document the finding on your anatomical map template and rate the local intensity on a 1 to 10 scale. Noting whether the pain fluctuates during different times of the day adds valuable context. Stanford research on referred pain mapping demonstrates that finding these primary nodes is critical for accurate clinical review.
Map Referred Pain Patterns
- Identify referred discomfort: Referred pain is discomfort perceived at a location entirely different from the site of the actual painful stimulus. This occurs because multiple sensory nerves converge on the same spinal pathways.
- Draw physical radiation paths: To accurately track this on your physical map, draw radiation paths using clear arrows indicating where the sensation shoots, travels, or spreads. Use different colored pens to distinguish between sharp, shooting nerve pain and deep, radiating muscle aches.
- Provide the complete neurological picture: For instance, sciatica often originates from nerve compression in the lumbar spine, but the patient’s pain tolerance is tested by severe sensations shooting down the back of the leg. Mapping both the origin in the lower back and the path down the calf allows specialists to prescribe targeted therapeutic modalities like localized steroid injections or specific stretching protocols.
Step 3: Pain Management Solutions
Effective pain management relies on matching the mapped symptoms to targeted, evidence-informed interventions rather than relying solely on generalized medication. Non-pharmacological interventions like TENS provide temporary relief for localized neuropathic and musculoskeletal pain by safely disrupting nociceptive pathways to the brain (National Institute of Neurological Disorders and Stroke). Treatment suitability varies, requiring ongoing assessment of functional outcomes.
Utilize Physical Therapy and TENS
- Begin active physical therapy: Active physical therapy is a rehabilitative approach designed to improve mobility and correct mechanical dysfunction. Physical therapy treatment back pain protocols address the structural root causes, such as muscular imbalances or poor posture.
- Apply a TENS unit for passive relief: Conversely, a Transcutaneous Electrical Nerve Stimulation (TENS) unit is a device that delivers small electrical impulses through the skin. Using a tens unit for pain treatment offers immediate, passive distraction from discomfort.
- Combine modalities for maximum benefit: A patient might utilize TENS for acute physical therapy treatment for sciatica pain flare-ups between active rehabilitation sessions. NIH research on TENS and non-pharmacological relief confirms these devices safely alter pain signaling.
| Intervention | Active/Passive | Primary Benefit | Best Used For |
|---|---|---|---|
| Physical Therapy | Active | Corrects structural mechanics | Long-term functional improvement |
| TENS Unit | Passive | Disrupts pain signals | Immediate temporary relief |
| Postural Correction | Active | Reduces joint strain | Ongoing daily prevention |
Integrate Alternative Therapies
- Explore acupuncture treatments: Integrating acupuncture and pain management strategies offers an evidence-informed adjunct therapy for complex conditions. Acupuncture targets specific anatomical points to stimulate the central nervous system, releasing natural localized pain relievers.
- Consider topical and technological adjuncts: Additional alternative therapies include topical analgesics and emerging non-invasive technologies like targeted red light therapy.
- Address complex chronic pain syndromes: Combining traditional physical therapy with acupuncture often assists patients in managing conditions where single-modality treatments fall short.
Step 4: Utilize Art Therapy Assessment Tools
Chronic physical discomfort routinely causes significant, unseen psychological trauma that requires non-verbal evaluation to fully understand the patient’s condition. Clinical applications of the Formal Elements Art Therapy Scale demonstrate strong inter-rater reliability when evaluating emotional distress and non-verbal trauma indicators in patient drawings (Loyola Marymount University). These assessments form the vital psychological half of The Dual-Axis Pain Evaluation.
Evaluate Emotional Distress with DDS
- Utilize the Diagnostic Drawing Series (DDS): The Diagnostic Drawing Series (DDS), a standardized art therapy assessment, evaluates a patient’s cognitive and emotional state through structured creative tasks.
- Complete the specific drawing tasks: This dds art therapy assessment requires patients to complete a series of specific drawings, allowing clinicians to analyze the psychological impact of their chronic illness.
- Execute a mandala art therapy assessment: Drawing within a circular format provides insight into a patient’s psychological centering and emotional regulation. Clinicians observe the use of space, line quality, and color choice to gauge internal stress levels.
Measure Psychology with FEATS and PPAT
- Execute the PPAT assessment prompt: The Person Picking an Apple from a Tree (PPAT) is a standardized drawing prompt designed to elicit measurable responses.
- Evaluate using the FEATS scale: Clinicians evaluate the resulting artwork using the Formal Elements Art Therapy Scale (FEATS), a measurement system for patient drawings.
- Analyze non-verbal cognitive processing: The ppat art therapy assessment and feats art therapy assessment differ significantly from verbal PQRST metrics. Clinical studies on FEATS inter-rater reliability confirm these tools accurately quantify unseen emotional distress and problem-solving abilities under the stress of chronic pain.
Step 5: Art and Chronic Pain
Utilizing art for chronic pain provides profound psychological relief but requires careful attention to physical ergonomics to prevent secondary issues. Occupational repetitive strain injuries, particularly localized to the wrists and hands, account for nearly 33% of all worker injury cases requiring specialized ergonomic intervention (Centers for Disease Control and Prevention). Managing this balance ensures sustainable creative expression.
Creative Expression for Pain Relief
- Use art as a non-pharmacological coping mechanism: The physical act of creating art serves as a powerful coping mechanism. When patients use art for chronic pain, the intense cognitive focus required for painting distracts the brain from processing nociceptive pain pathways.
- Study historical success cases: Historically, famous artists with chronic pain, such as Frida Kahlo and Pierre-Auguste Renoir, successfully utilized creative expression to navigate severe physical limitations.
- Maintain quality of life: These artists maintained their quality of life despite advancing conditions, though this creative outlet must be managed carefully to avoid introducing new physical traumas.
Prevent Repetitive Strain Injuries
- Identify occupational hazards early: A repetitive strain injury involves tissue damage caused by repeated physical movements, presenting a significant occupational hazard. Painters wrist pain and artist thumb pain are common complaints resulting from prolonged gripping of brushes.
- Implement practical ergonomic interventions: To prevent these localized injuries, artists must implement practical interventions like taking mandatory breaks every 45 minutes and utilizing supportive compression braces.
- Correct seated posture: Proper canvas ergonomics are essential. CDC statistics on repetitive strain injuries emphasize that early ergonomic correction prevents permanent tissue damage.
Safety Precautions and Limitations
Common Pitfalls in Self-Mapping
A primary pitfall occurs when patients over-fixate on localized pain while entirely ignoring referred symptoms. Focusing solely on a painful knee while failing to map the radiating ache from the hip leads clinicians to treat the wrong anatomical area. To avoid this, always document systemic symptoms and radiation paths meticulously.
Another common error involves relying strictly on physical mapping while ignoring the emotional toll of chronic illness. Without tools from The Dual-Axis Pain Evaluation, patients receive incomplete treatment plans that overlook profound psychological distress. Ensure you track mood and stress levels alongside physical symptom intensity.
Finally, patients often mistake self-mapping for self-diagnosis. Mapping is strictly a communication tool designed to organize data for your doctor; it cannot replace professional clinical judgment or targeted diagnostic imaging.
When to Seek Immediate Expert Help
Self-assessment should be immediately suspended if you encounter specific medical red flags that suggest an acute emergency. If your mapping process reveals sudden, severe numbness in the extremities, or a sudden loss of bowel or bladder control, seek emergency medical care immediately, as these may indicate severe neurological compromise.
Additionally, if chronic discomfort is suddenly accompanied by a high, unexplained fever, rapid weight loss, or inability to bear weight on a joint, bypass self-tracking. Frame your health with proactive safety; consulting a qualified clinician in the presence of these symptoms protects your long-term functional outcomes and ensures patient safety.
Frequently Asked Questions
What are the 5 P’s of pain assessment?
The 5 P’s of pain assessment are Provocation, Quality, Region, Severity, and Timing. This clinical mnemonic helps medical professionals systematically gather data about a patient’s discomfort, minimizing diagnostic errors and ensuring no critical symptom dimensions are overlooked. For instance, determining the precise timing of flare-ups guides targeted interventions, making it essential for patients to utilize this framework prior to specialist consultations.
How do you perform a COLDSPA pain assessment?
Performing a COLDSPA assessment involves evaluating Character, Onset, Location, Duration, Severity, Pattern, and Associated factors. The patient systematically answers questions pertaining to each specific category to create a comprehensive symptom profile. This framework effectively captures timeline metrics during medical triage and differentiates between acute injuries and chronic progressive conditions. Discussing these specific metrics with a qualified clinician substantially improves overall diagnostic accuracy.
What is the pain mapping procedure?
The pain mapping procedure is a visual documentation technique where a patient marks the exact location, intensity, and movement of discomfort on an anatomical body chart. This tracking helps differentiate between localized muscle injury and complex referred pain pathways. Utilizing a 1 to 10 severity scale over a 14-day period provides measurable functional outcomes. Proper mapping empowers patients to present organized evidence to neurologists or rheumatologists. A thorough map ensures clinical interventions target the true root cause.
How do you use a TENS unit for pain treatment?
To use a TENS unit for pain treatment, place the adhesive electrode pads near the localized area of discomfort and activate the device to deliver small electrical impulses. These impulses safely disrupt nociceptive pain signals traveling to the brain, providing temporary non-pharmacological relief for musculoskeletal discomfort and acute sciatica flare-ups. Settings must be adjusted based on individual patient tolerance and condition severity. Always consult a physical therapist or clinician before integrating TENS into a management plan.
Conclusion
For undiagnosed patients, learning the principles found in a How to Use Pain Mapping: Complete Beginner’s Guide delivers structured communication for crucial clinical evaluations. Standardized pain assessments utilizing evidence-informed frameworks reduce clinical error margins significantly (U.S. Department of Veterans Affairs). The best approach combines the physical tracking of localized trigger points with appropriate clinical terminology, empowering patients to advocate for their health effectively.
This structured methodology is the foundation of The Dual-Axis Pain Evaluation, ensuring neither physical symptoms nor emotional distress are overlooked. By merging anatomical data with psychological insight, this framework transforms vague frustration into organized, actionable medical evidence. Addressing the physical body without measuring the psychological impact frequently results in incomplete recoveries.
Get started by downloading an anatomical map template and tracking your symptoms using the PQRST method for 14 days prior to your next specialist appointment.